
Read this great article sent via email by an electrical engineer this week and enjoy :)
“Hi everybody! Whether you are running out of time to deliver a project, or you are just too much stressed out with other complex tasks, there is no doubt that these are times when designing electrical installations could be troublesome. But hey, don’t worry, I’m here to give you a hand.
These are my best tips to spare you time in your electrical installation’s designs, let’s take a look at them!”
1- Ask these couple of questions first
– Who is the final client? (do they have their own electrical standards?)
– Do I understand what are the electrical requirements of every area?
2- Know what your market has to offer
Always take a look around to electrical stores nearby before you start designing. It may sound something odd to do when you are really concerned about your time running out, but this hint is the first step that will put you in the right direction.
When you know what the market has to offer, you are able to design your electrical installations according to the available equipment. Now that you have found your available options, choose the ones that make you look professional, also you are able to clarify any doubts you may have, for instance, what you need to install something as simple as a Liquid Tight Pipe (you just need to ask any vendor).
But this hint can even ease your work because, when you are designing, there are tons of items you can choose for a particular scenario. If you don’t master your market nearby, your time will be depleted by figuring out which item will fit best for your situation: You must consider the most common cables, load centers, breakers, outlets according to your client needs.
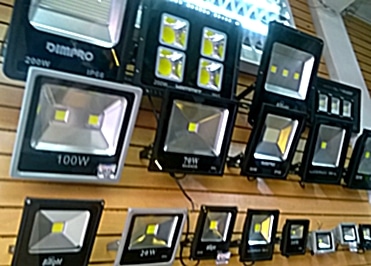
Fig1: A common stock, several options for the same purpose: Illuminate an outdoor spot
3-The amount of circuits that your Load Center will have
Select the best Load Center for your area: if we are talking about an apartment it will probably be an AWG #12 gauge circuits Load Center with 2 live phases; If it is a house with 3 rooms, then it is enough one with 12 circuits and 3 live phases; If it is an office, with 3 or 5 environments you don’t need that much, with 8 circuits and 2 live phases should do the work.
If it is an industrial area: with rotating electrical loads, welding machines, arc furnaces, there is noise, and a lot of work, then your design should use a Load Center with 3 live phases, with at least 24 circuits for heavy duty, with the Main Breaker.
This tip is flexible, but what really matters is to know how many circuits will manage your Load Center, this will restrict the outlets and lighting outputs of your design, thus saving you from wasting time trying to figure out how many circuits you have made.
4- Estimate your loads beforehand
Number of electrical outlets, special outlets (motor loads and heavy-duty load) and lighting outputs needed for every environment.
5- Simplify your cable options
When it comes about lighting circuits it is the best option to use a #12AWG gauge wire, of course, this is true when you are designing for an indoor area. When the situation changes, the best option is to study how far is your nearest load center, if you are really far (far enough that you are considering using a #8AWG).
When you are dealing with electrical outlets, the best thing to do is to limit how many of them are going to be connected to the same circuit, taking into account the current they withstand.
Normally the outlets manage 15 or 20 Amps, so the #10AWG should be enough, and do not put more than 6 of them to the same circuit.
Special outlets should be treated individually, normally, this kind of loads don’t consume more than 60 Amps and they need their own breaker and more than one live phase.
There are scenarios when there are several load centers distributed across the designing area, in such cases I recommend to use the same gauge wire for all of them, according to the rated Amps of your outlying Load Center. It may sound expensive but surely will work.
6- Always start from the loads
Start your design by establishing the number of outlets and lighting outputs that a room needs, then go to a convenient place for a junction box that will allow passing all the cables needed for that particular room. Then go to a junction box that will work as a distribution box. Finally, go to your nearest Load Center (if any), and from there to the main load center of your area.
7-Take into account a larger pipe
There are several options to choose from, but the thing is that you need to foresee (somehow) any more requirements that the final client will need in the future, could be adding an extra outlet, a new room, one more area. Those scenarios could happen and nothing will be more troublesome than trying to pass cables across an already filled up pipe. Don’t try always the cheapest way (will be expensive in the future) and use a pipe that allows you to pass an additional amount of 3 #12AWG cables.
Final thoughts
Keep in mind that you have a huge amount of options to use during the designing, so the key here is to reduce them as much as you can, to find the optimum option. After that, you can start designing.
Never ignore the electrical standards of the country, state or federal entity in which will be built for your design, take a time to read the most useful advice focusing in the standards for electrical outlets, the lighting outputs, and special outlets.